

How To Make Glitter Effect In Photoshop
Add a little sparkle and your photos become magical. You can make snow glisten or add a starlight result. A stick becomes a magic wand, stars streak across the sky, and fireflies fill the nighttime. This article volition show you how to create a sparkle issue in Photoshop step by step.
We are going to create a sparkle brush. This will give y'all the virtually flexibility. We will save it then you can easily utilise sparkle to your photos. Y'all can brush over your whole photo as an overlay, or you tin can add together a magic touch on to a small area. The sparkle brush that you make volition be unique to you. But you volition have this touch of magic!
The steps are extremely easy. Permit's start by making the brush. So, we will apply the sparkle to a couple of photos.


Creating a Sparkle Brush
Step 1: Open a New Certificate in Photoshop
Open Adobe Photoshop and create a new document. Become to the File menu and select File > New Certificate (Ctrl/Command+North). In the New Document window, set the width and height to 2500px. Make sure the Background Contents colour is set to white.
Click Create.

Stride 2: Actuate Legacy Brushes
We will make our new brush using a combination of brushes available in Photoshop. Some of the best brushes to apply when making sparkles are legacy brushes. These may be hidden in your version of Photoshop.
Here is how you can find these legacy brushes. (If you already run into a folder called 'Legacy Brushes' in the Brush Preset Picker drop-down menu, you can skip this footstep.)
To prove the legacy brushes, click on the Castor tool in the toolbar. In the Options bar along the top of your workspace, click the folder icon adjacent to the Brush Preset Picker.
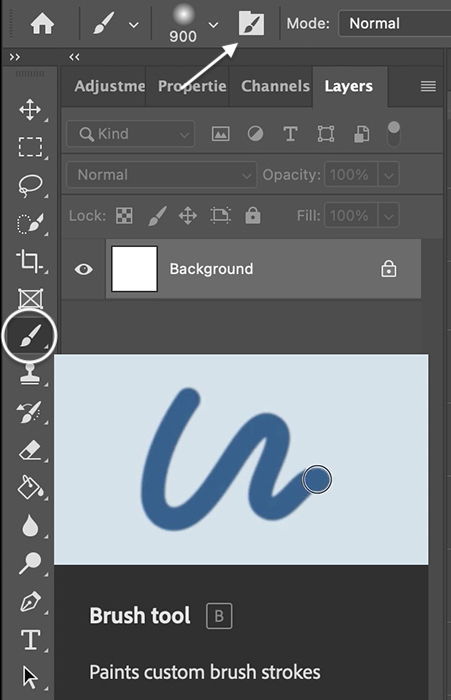
This opens the Brush Settings panel.
In the Brush Settings panel, select the Brushes tab. And then, click the three-line icon in the upper right-hand corner. In the menu that appears, select Legacy Brushes.
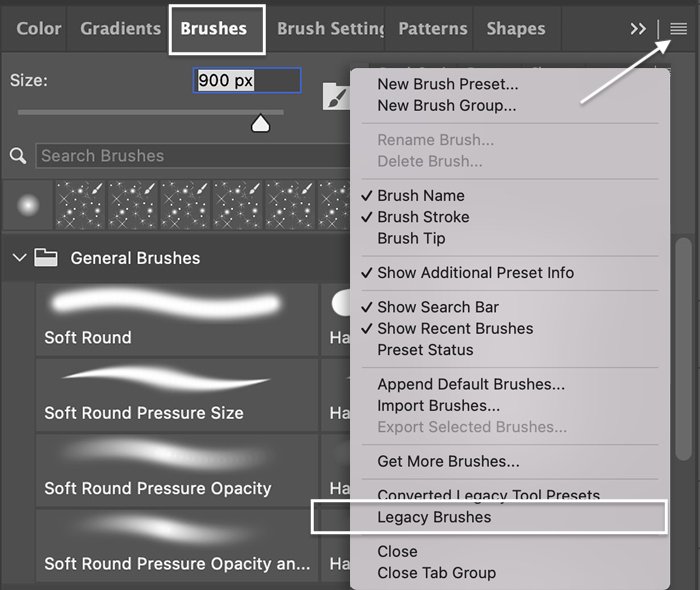
Photoshop will enquire you if you lot want to restore the legacy brushes to the list of brush presets. Click OK.
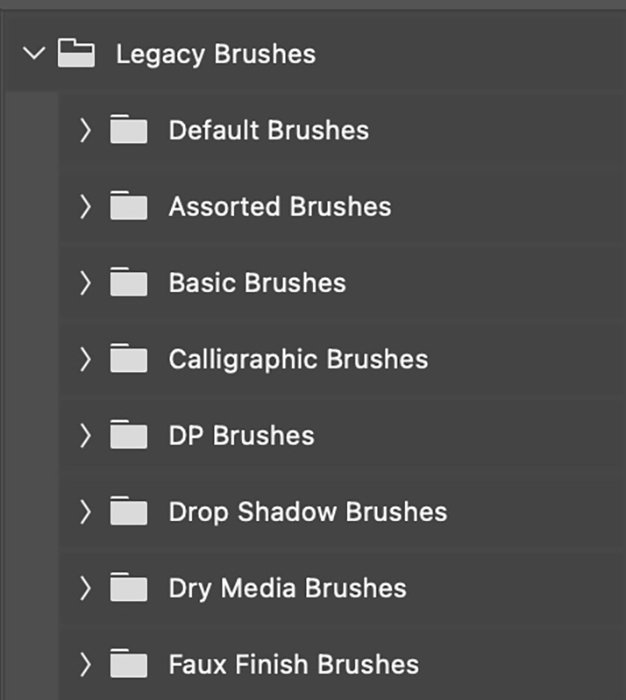
When you go to the Castor Preset Picker in the Options bar, you should now accept a new prepare of brushes to choose from. Open the Legacy brush binder to reveal nearly 20 boosted folders of brushes. We volition use brushes institute mainly in the Default Brushes and Assorted Brushes folders.
Stride 3: Set Foreground Colour to Black
Before you kickoff creating your brush, set the foreground color to black. To do this chop-chop, click the D hotkey. This will gear up your foreground and groundwork colours to their defaults. The default foreground colour is blackness.
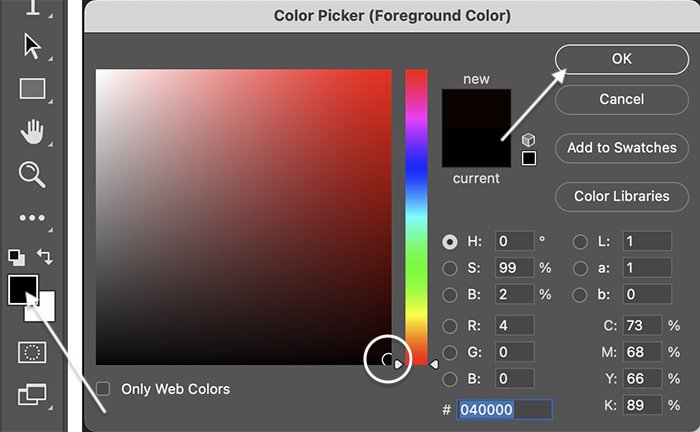
Or click the foreground colour square towards the bottom of the left toolbar. This opens the Color Picker window. Click on the lower right corner to choose black.
Click OK.
Footstep 4: Choose a Star-Shaped Brush Tool
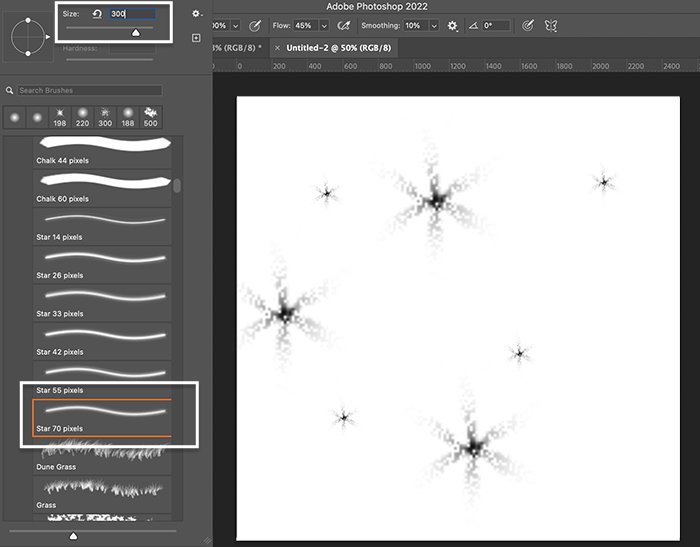
Click on the Brush tool in the toolbar. In the Options bar on top of the workspace, choose a star-shaped brush from the Brush Preset picker. For my sparkle castor, I started with the Star lxx castor located in the Default Brushes folder. There are many other options available in the Legacy Castor folder. Here are some favourites:
- Star 70
- Crosshatch 1
- Crosshatch 4
- Star – Small
- Star – Large
- Starburst – Minor
- Starburst – Large
- Texture 4
- DP Star
- Round Fan with Texture
- Hypno Line
Experience costless to experiment with other brushes. Shapes like diamonds and triangles as well work well every bit part of the sparkle brush. You tin can besides employ a soft round brush for a round shape. But employ a depression Flow rate. A dense centre will pull the eye.
As well, you can download other brushes from the web. Some are free, and others you must purchase.
Cull a big brush size. around 300px, to starting time. Click on the white background layer and add three or 4 shapes. Place the shapes randomly across the sheet.
Step five: Add together Brushstrokes of Varying Size
Alter the brush size and add a few more brushstrokes.
You tin can change the castor size in the Options bar or use the subclass keys. The left bracket central ( [ ) makes the brush smaller. The correct bracket central ( ] ) makes the brush larger.
Don't add too many brushstrokes. You will add some variety to the shapes in the next step.
Step 6: Select a 2nd Shape
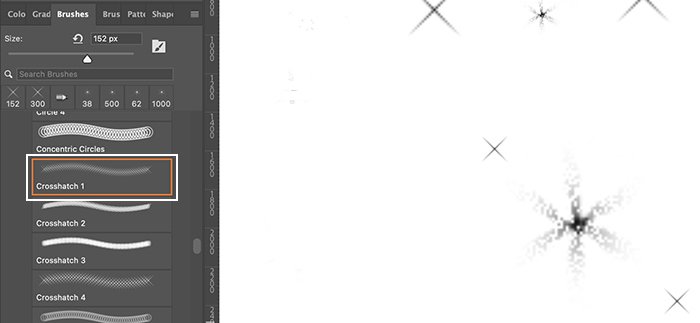
Select a different-shaped brushstroke. I used the Crosshatch 1 castor located in the Assorted Brushes binder. Choose a large castor size and add iii or four shapes.
Try not to overlap with other shapes and get out a lot of white space between brushstrokes.
Change the brush size and add a few more brushstrokes.
Step 7: Select a Third Shape
Select a tertiary brushstroke shape. I used the Starburst – Large brush located in the Assorted Brushes folder. Choose a large brush size and add three or four shapes. Change the castor size and add a few more than brushstrokes.
You lot can utilise more than three shaped brushes. But exist careful non to overdo it. You exercise not demand too many dissimilar shapes. Choose 3 or 4 dissimilar shapes. For each shape, choose two or 3 different sizes.
Keep the shapes within the white frame of your background layer and leave a lot of white space between shapes. Experiment with different sizes and brush shapes to create unique sparkle brushes.
Hither is my terminal selection of brushstrokes.
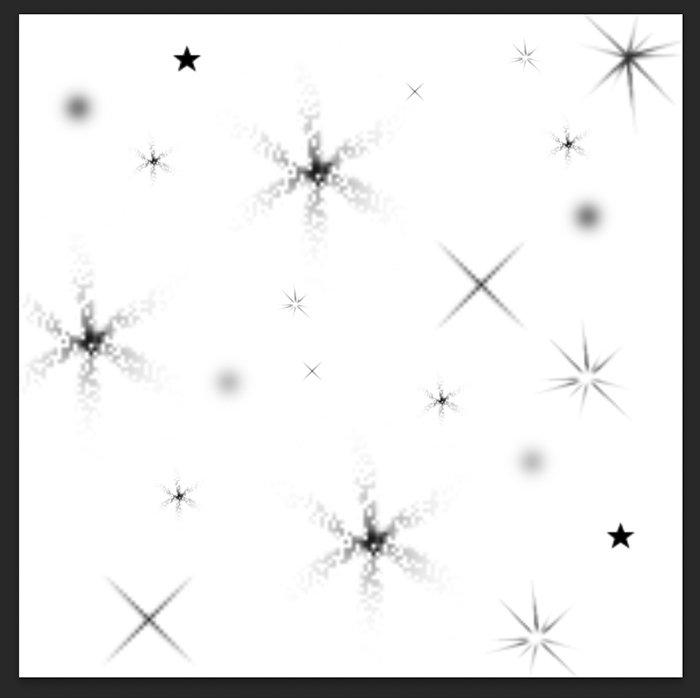
Step 8: Save the Canvas as a Castor Preset
When y'all are happy with the shapes and their positions on the background layer, save it as a brush preset. This will permit you access the brush anytime you desire to add a sparkle issue or overlay. Go to the Edit carte. Select Edit > Define Castor Preset.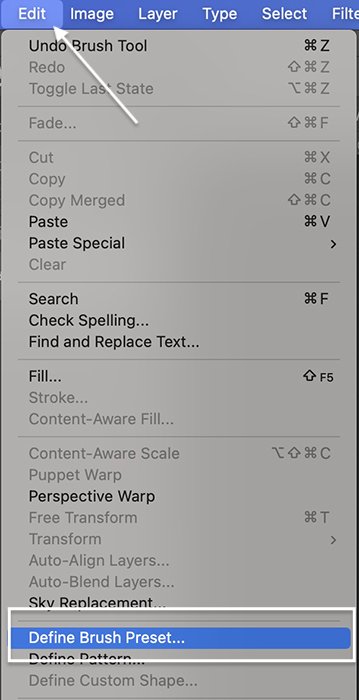
Requite your brush a name and click OK. Close the file that you used to create the sparkle brush. There is no demand to salve it. Your piece of work is saved every bit a brushstroke that yous can use whenever you want.
That'south it! Y'all have your own personal sparkle brush. You should see it at the bottom of the listing of brushes. So allow's employ your new castor to add sparkle to a photograph.
How to Add together a Sparkle Overlay to a Photo
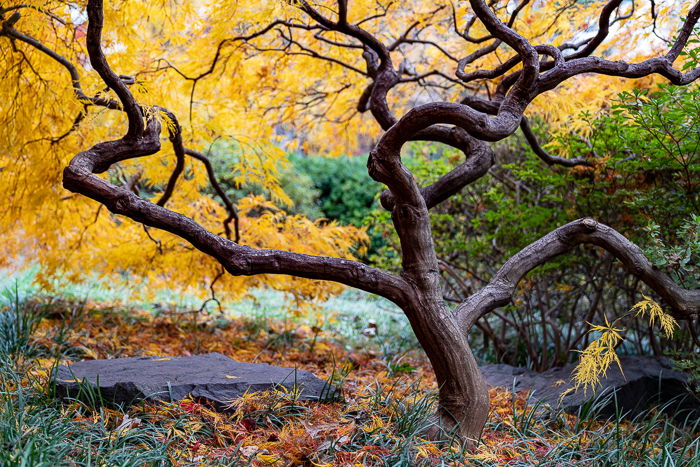
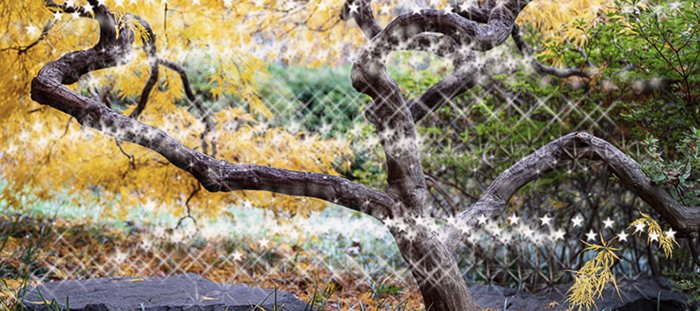
In Photoshop, open up a photo that needs a bit of sparkle. The sparkle castor that y'all created is flexible. You can utilise information technology to add a sparkle overlay to the unabridged image. Or you tin add sparkle to a selected area of a photo. Let'southward add a sparkle overlay to this photograph.
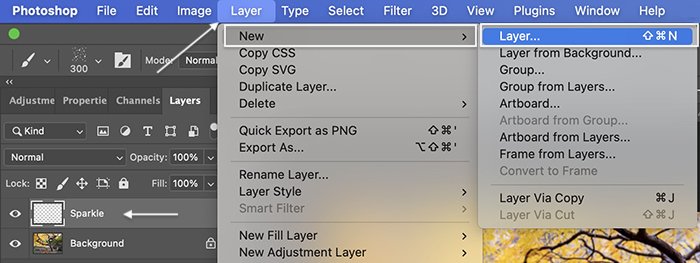
Step 1: Open Photo and Create a New Layer
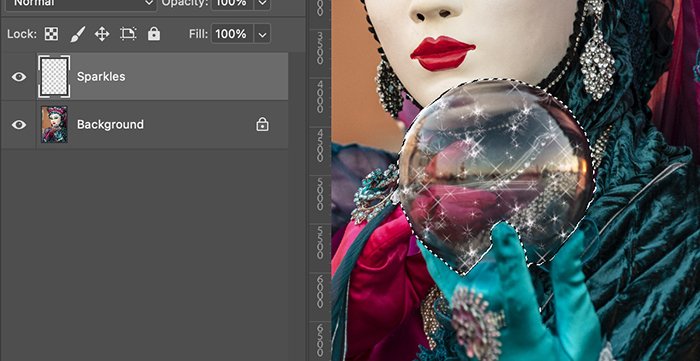
Open your photograph in Photoshop. Add together a new layer past going to the Layer drib-down menu. Choose Layer > New > Layer (Shift+Ctrl/Command+Northward). Rename the top layer 'Sparkle'.
Step 2: Fix Foreground Color to White
Set the foreground colour to white. To exercise this chop-chop, first, click the D hotkey. This will set your foreground and background colours to their defaults. The default foreground colour is blackness. Then Click the X key. This inverts the foreground and background colours. Or yous tin click the foreground colour square towards the lesser of the toolbar. This opens the Color Picker window. Click on the upper left corner to cull the colour white.
Click OK.

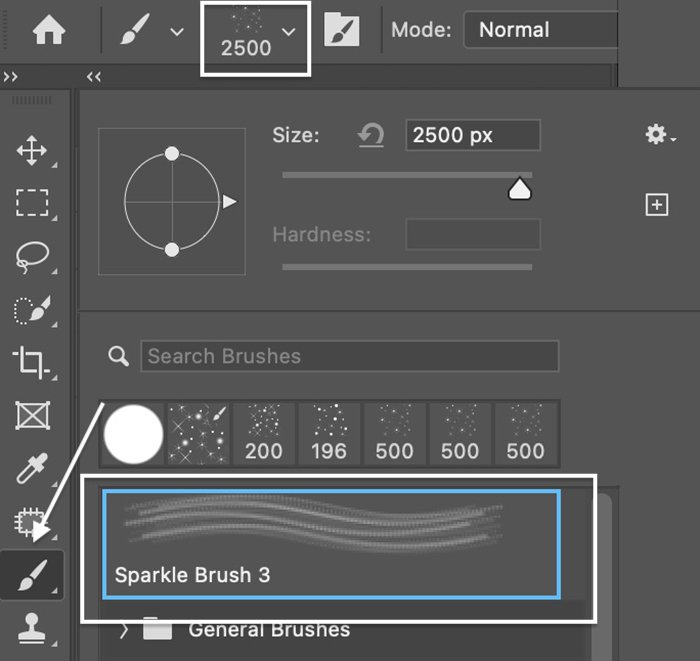
Pace iii: Choose the Sparkle Castor
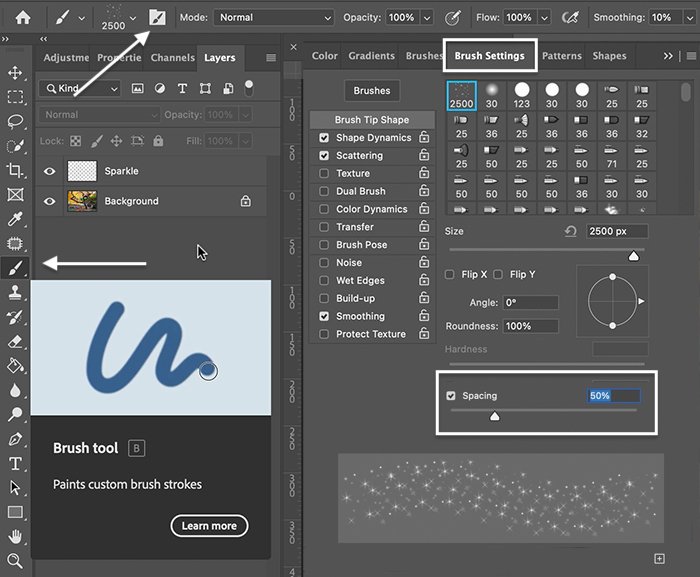
Click on the Brush tool in the toolbar. In the Options bar on height of the workspace, cull the sparkle brush you created in the Castor Preset picker. By default, information technology will exist at the bottom of the list. But you tin can drag and movement it to the tiptop or into a binder.
Pace 4: Randomise and Infinite the Brushstroke for Painting
Once yous select the sparkle castor, yous are ready to start painting. You can size the brush and click once on your image. Sparkles appear!
Only if you click and elevate across your photograph, the upshot is lost. Yous will get a smear that does not expect very magical.
So, you first desire to space and randomise the shape of your castor. This will reduce obvious patterns and make the sparkles appear more than naturally when y'all drag the brush across your epitome.
Open the Brush Settings panel by clicking the folder icon next to the Brush Preset Picker. In the Settings panel, select the Brushes tab.
In the Castor Tip Shape console, set the Spacing to 50%. This spaces out the sparkle.
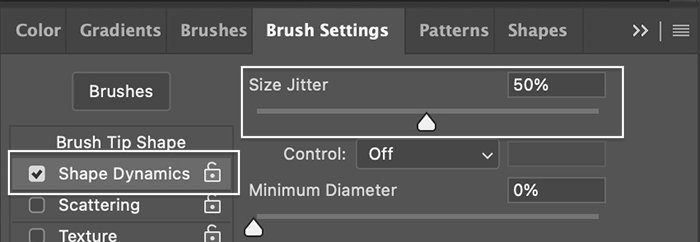
Click on Shape Dynamics. Click on the label to open the console (clicking the checkbox side by side to the label does non open the panel).
Prepare' Size Jitter' to 50%. 'Jitter' defines how much randomness Photoshop adds to the brushstroke. Y'all can too modify the 'Bending Jitter' and 'Roundness Jitter'. These change the specified properties of the brushstrokes too.
Click on Scattering. Set besprinkle (randomness of number and placements of brushstrokes) to 100%.
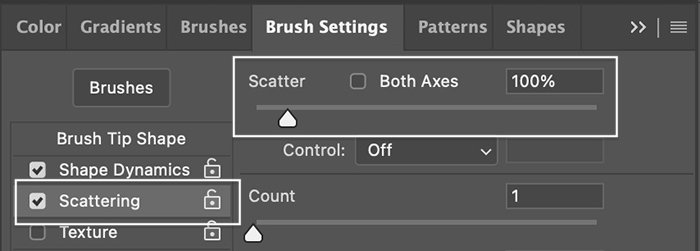
The preview box at the lesser of the console shows how the brush looks for each change. Experiment with the spacing, jitter, and scatter.
There are many other Brush Settings options to explore. You can save your favourite settings as a new brush by clicking the plus sign in the lesser right corner of the Settings panel.
Step 5: Paint an Overlay on the Sparkle Layer
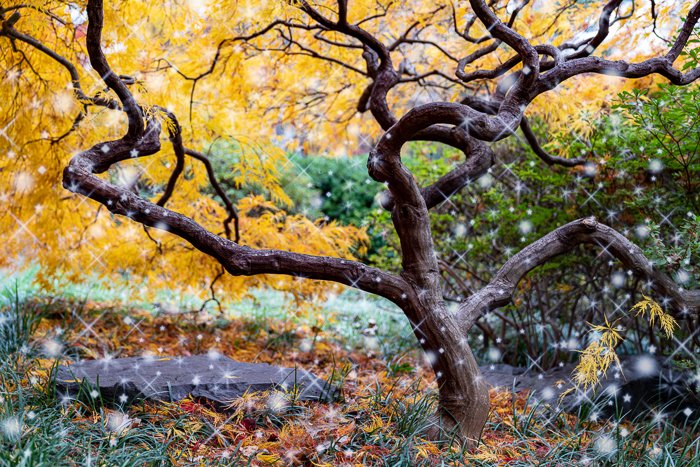
Add together a lot of sparkles to concentrate areas, and you will get a glitter outcome.
Select the top layer. Choose a large size for your sparkle brush and paint beyond your photo. You can too click once on a section to add sparkle to a photo. If you wish, modify the castor size and paint beyond the epitome a 2d time.
You will not need too many strokes to get sparkles across your image. A few sparkles will go a long way.
Step 6: Duplicate the Sparkle Layer and Add Gaussian Blur
Duplicate the Sparkle layer by going to the Layer driblet-down menu. Select Layer > Duplicate Layer (Ctrl/Comad+J).
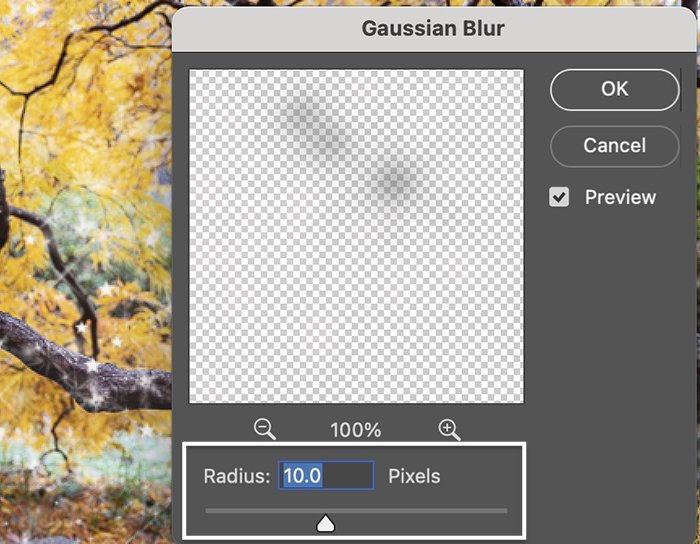
Add a Gaussian blur to the duplicate layer. Go to the Filter drop-downward menu. Select Filter > Mistiness > Gaussian Blur. Select a blur radius of between five and 10px. Information technology volition be hard to run across the blur in the preview window. Simply you will be able to see the blur in your image.
Information technology is okay to add a lilliputian more blur than yous need. You can reduce the opacity of the blur layer later.
Step 7: Add a Coloured Glow (Optional)
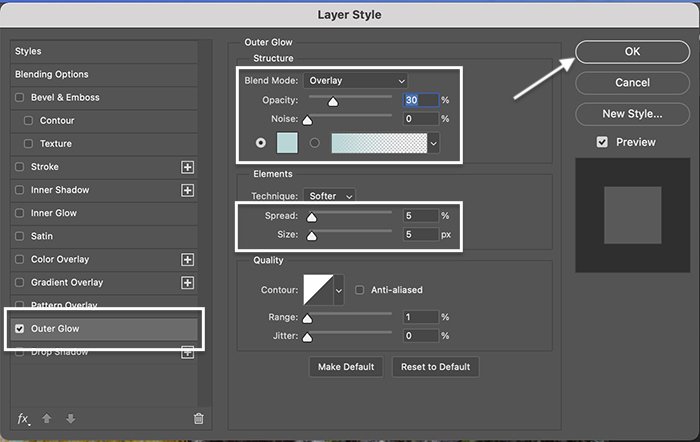
Add a coloured glow to your sparkles by double-clicking on the Sparkles layer. In the Layer Style window, select Outer Glow. Set the Blend Mode to Overlay or Soft Calorie-free and lower the opacity betwixt 30% and 50%.
Click the coloured square to set the colour of the glow. Utilize the Eyedropper tool to cull a colour from your image. Or, select a colour by clicking in a coloured box.
Set the 'Spread' to 5% and the 'Size' to 5px. Feel free to experiment with these settings to get a expect you like.
Click OK.
How to Add a Sparkle Effect to an Object
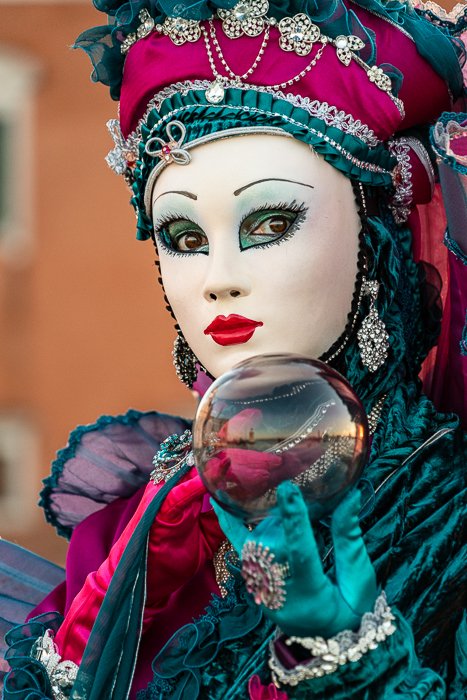
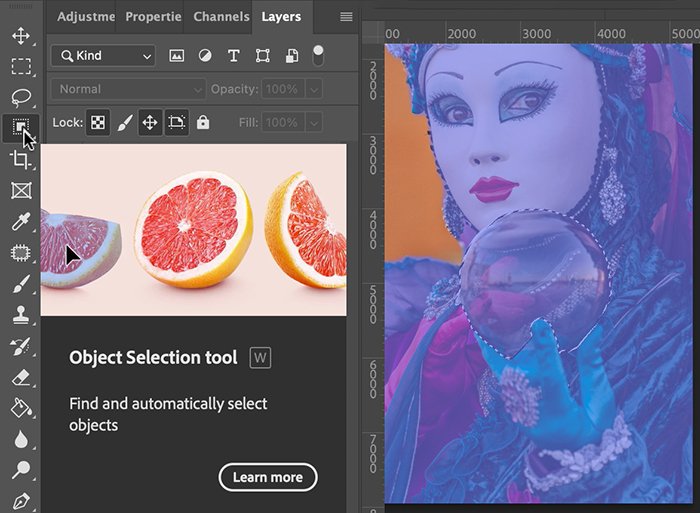
Yous can add sparkles to an object or a targeted area of an epitome to create a fantasy effect. Allow'due south add sparkles to the drinking glass ball held by a costumed model at the Venice Funfair.
Follow the steps outlined to a higher place for Steps 1, 4, six and 7 beneath.
Step one: Open the Prototype in Photoshop
Footstep 2: Add together a New Layer
Step 3: Select an Object
If y'all want to place the sparkles inside or on an object, use the Select Object tool. Highlight the background image and choose the Select Object tool from the toolbar. This tool is bundled with the Quick Option tool.
Depict a square around the object you want to select. In this case, I have fatigued a foursquare around the glass ball. When you release, at that place volition be marching ants around your selection. Refine the selection with the Quick Selection tool.
Step four: Set Foreground Color to White
Pace 5: Choose the Sparkle Castor Tool
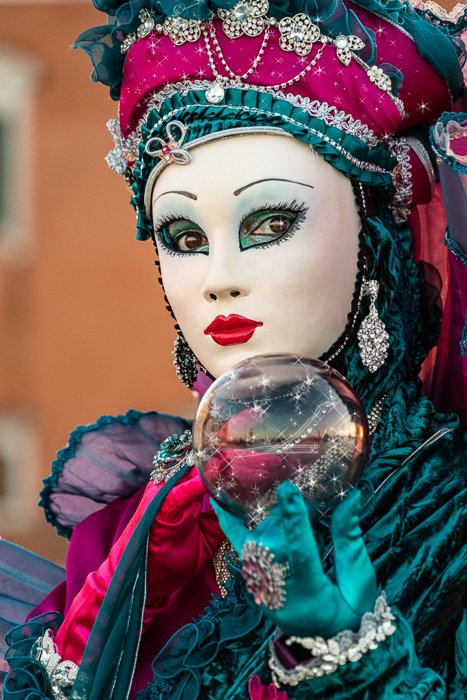
Highlight the superlative layer and activate the Brush tool. Choose the sparkle brush that you lot created from the Brush Preset picker. Size the brush a little smaller than the object you have selected.
Click on the area a couple of times. Your sparkles will stay within the selected area.
When you are finished, deselect the area. Go to the Select drop-downwards menu. Choose Select > Deselect (Ctrl/Control+D).
You can experiment with unlike-sized brushstrokes. Place the sparkles randomly and try not to overlap them too much. To refine the sparkles, add together a layer mask to the sparkle layer. Then, using a soft, black brush, remove actress sparkles.
You tin can add sparkles to jewellery using your brush. Or you can utilise the Lens Flare filter. You tin fifty-fifty add a catchlight to the middle by clicking once over the eye to identify sparkles and removing the actress sparkles with a layer mask.
Footstep 6: Duplicate the Layer and Add a Gaussian Blur
Step seven: Add Colour with an Outer Glow Way Effect (Optional)
Determination
Photoshop makes information technology easy to add a fleck of magic to your photos with a sparkle brush. Creating a versatile sparkle effect is surprisingly like shooting fish in a barrel. Apply the star-shaped, legacy brushes installed in Photoshop. Brush different sizes and shapes onto a white canvas. And save the sheet every bit a brush. Once you have created your ain sparkle brush, you tin add sparkle to a targeted expanse of a photo. Or yous tin can brush the sparkle over the entire photograph as a sparkle overlay. Have fun adding your unique sparkle event in Photoshop!
Effort out The Magical Photography Spellbook e-volume for unproblematic tips to create mesmerising images!
Source: https://expertphotography.com/sparkle-effect-photoshop/
Posted by: deleonineaskuld.blogspot.com
0 Response to "How To Make Glitter Effect In Photoshop"
Post a Comment